Widgets allow you to add dynamic content to your website’s Blogsidebars, or other widget-ready areas. In the Guto theme, you can easily manage widgets from the WordPress Dashboard → Appearance → Widgets section.
How to Add, Edit, or Remove Widgets
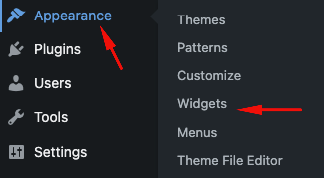
Navigate to Widgets Section:
Go to Dashboard → Appearance → Widgets.
You’ll see a list of Available Widgets on the left and Sidebar Areas on the right.
Adding a Widget:
Drag a widget from the Available Widgets section to a Sidebar or Widget Area on the right.
Alternatively, click on the widget, select a widget area, and click “Add Widget”.
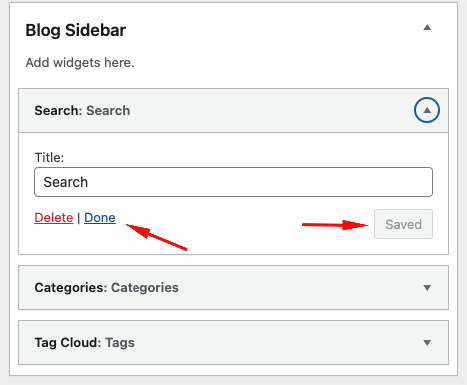
Configuring the Widget:
Once added, click the dropdown arrow on the widget to customize its settings.
Adjust the title, content, and display settings as needed.
Click “Save” to apply the changes.
Removing a Widget:
Click the dropdown arrow on the widget in the sidebar.
Click “Delete” to remove it.
Understanding Widget Areas (Sidebars) in Guto Theme
Guto theme includes different widget areas where you can place widgets:
Blog Sidebar – Appears on the blog pages, useful for adding categories, recent posts, or a search bar.
Shop Sidebar(For WooCommerce sites) – Used for product filters, categories, cart widgets, and more.
Common Widgets You Can Use
Search – Adds a search bar for site visitors.
Categories – Displays a list of blog categories.
Recent Posts – Shows the latest blog posts.
Tag Cloud – Displays frequently used tags.
Cart(WooCommerce) – Shows the shopping cart contents.
Calendar – Displays a calendar with published posts.
Final Notes
Widgets help improve user engagement and functionality by displaying dynamic content in different sections of your site.